

In This Article
It’s simple to tailor the date ranges for your analysis within the Placer platform. Watch the quick tips video above – or review the steps below – to learn how.
Step 1: Choose a custom date range for your current report.
a. Navigate to the property tab. Open the date range dropdown near the top left corner of your report.
b. Select “Custom Range”.
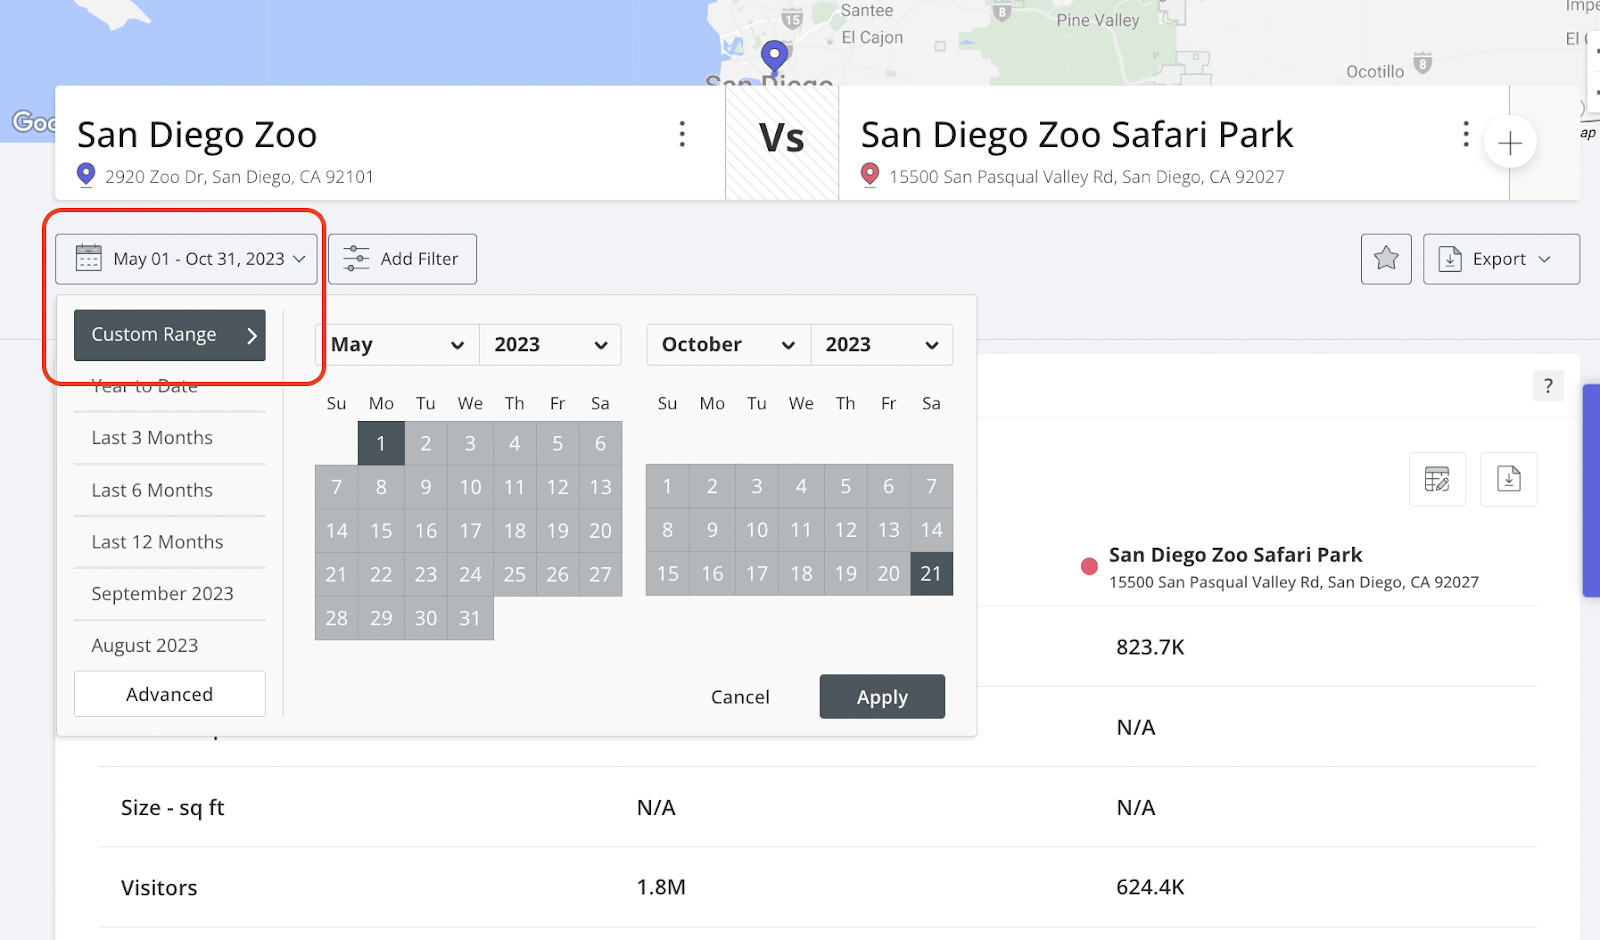
c. First, select the months and years. Then click the actual date range that you'd like to analyze. Select “Apply”.
Step 2: Adjust your default date range settings.
a. Click on your name in the top right corner.
b. Select “Account & User Settings”.
c. Input the date range that you’d like to use as the default option in all future reports.